Tuesday, 23 October 2018

Patchwork Patterns

Dear Friends,

Another Inspiration for Heartfelt Creations with beautiful Buttons and Blooms Collection. Here's the pix


Products Used
Double Dots 100pc. -3D Foam Circles, DDOTS
Funnel Tray, 359503
Designer Dries Clear Adhesive, 159723
Deluxe Flower Shaping Kit, HCST1-401
Stack and Store Daubers-Pack of 30, HCDA2-450
Ranger Archival Ink Pad - Rose Madder, RACP638
Eyelet Lace Frames Die, HCD2-7192
Ornamental Tags Die, HCD1-7203
Hand-Stitched Accents Cling Stamp Set, HCPC-3851
Patchwork Pocket & Patterns Cling Stamp Set, HCPC-3850
Buttons and Blooms Cling Stamp Set, HCPC-3849
Buttons and Blooms Paper Collection, HCDP1-295
Hand-Stitched Accents Die, HCD1-7207
Patchwork Pocket & Patterns Die, HCD1-7206
Buttons and Blooms Die, HCD1-7205

Other Products: White cardstock. Big Shot machine.

For more tips on creating with the Buttons and Blooms collection, watch the tutorial at https://youtu.be/WpR2XrSH0U0.

Instructions: Card size 7.75"x 6" (final size). Take pattern paper from the Buttons and Blooms Collection and adhere it on the card base.

Cut one Eyelet Lace frames Die on white cardstock and adhere it on the card base as shown.

Cut One stitched decorative frame from Hand-Stitched Accents Die on white cardstock and adhere it with foam tape.

Stamp two hand stitched zig zag patterns from Patchwork Pocket & Patterns Cling Stamp Set with archival ink-paradise teal and cut them with matching die and distress the edges with same ink. Adhere with foam tape as shown. Stamp some small decorative patches with archival ink-paradise teal and vibrant fuchsia and cut them matching die and distress the edges with same ink and adhere them as shown.

Stamp some flowers and buttons from Buttons and Blooms with archival ink-Sunflower, Paradise Teal, Vibrant Fuchsia and cut them with matching die. Color them with same ink on the edges of the petals and shape the flowers with Deluxe flower shaping tool kit. Paste buttons at the centre of the flowers and arrange these flowers as shown.

Now add sentiment from Ornamental Tags Die "A Gift For You". Cut this die on white cardstock and one on pattern paper and arrange them as shown.

Thursday, 18 October 2018

Buttons Galore

Dear Friebds,

New Inspiration for Heartfelt Creations with the Buttons and Blooms Collection


Products Used
Double Dots 100pc. -3D Foam Circles, DDOTS
Funnel Tray, 359503
Designer Dries Clear Adhesive, 159723
Deluxe Flower Shaping Kit, HCST1-401
Stack and Store Daubers-Pack of 30, HCDA2-450
Rajni Chawla's Crystal Clear, PGM15015
Decorative Medallion Die, HCD1-7144
Ranger Archival Ink Pad - Jet Black, RACP468
Ranger Archival Ink Pad - Rose Madder, RACP638
Ranger Archival Ink Pad - Garden Patina, RACP992
Ranger Archival Ink Pad - Leaf Green, RACP436
Ranger Archival Ink Pad - Cactus Flower, RACP985
Ranger Archival Ink Pad - Plum, RACP499
Hand-Stitched Accents Cling Stamp Set, HCPC-3851
Patchwork Pocket & Patterns Cling Stamp Set, HCPC-3850
Buttons and Blooms Cling Stamp Set, HCPC-3849
Buttons and Blooms Paper Collection, HCDP1-295
Hand-Stitched Accents Die, HCD1-7207
Patchwork Pocket & Patterns Die, HCD1-7206
Buttons and Blooms Creative Essentials, HCCE1-641

Other Products: White cardstock. Beads String.

For more tips on creating with the Buttons and Blooms collection, watch the tutorial at https://youtu.be/WpR2XrSH0U0.

Instructions: Card size 6" x 6" (final size). Take pattern paper from the Buttons and Blooms Collection and tear the edges and adhere it on the card base. Take one tag and distress the edges and then tear the edges and adhere it with foam tape.

Cut decorative medallion die twice on white cardstock and adhere it as shown.
Now stamp one pocket image from Patchwork Pocket and Patterns Cling Stamp Set with archival ink-jet black and cut it with coordinating die and color with archival ink-rose madder and adhere it with foam tape to give some dimension. Stamp sentiment on the pocket image with archival ink-jet black.

Now stamp some flowers and buttons from Buttons and Blooms Cling Stamp Set with archival ink-plum and garden patina on white cardstock and cut them with coordinating die and color them with archival ink-sunshine, rose madder, cactus flower, garden patina (as shown). Then adhere two layers of petals to make one flower, add the button at the centre of the flower and then add some crystal clear glitter on the petals.

Arrange the flowers on the card and add some bead strings as shown.

Wednesday, 10 October 2018

Intricate Birthday Wishes

Dear Friends,

Debuting the Buttons and Blooms Collection by Heartfelt Creations. Beautiful floral fabric, delicate trimmings and charming buttons accompanied by delicate hand-stitch work, and precise patchwork become a most exquisite project in the hands of an experienced seamstress! While sewing may not be a talent gifted to everyone, you can now experience the same stunning results in your paper crafts with our new Buttons and Blooms Collection! Here's my inspiration


Products Used
Double Dots 100pc. -3D Foam Circles, DDOTS
Funnel Tray, 359503
Designer Dries Clear Adhesive, 159723
Deluxe Flower Shaping Kit, HCST1-401
Stack and Store Daubers-Pack of 30, HCDA2-450
Rajni Chawla's Crystal Clear, PGM15015
Eyelet Circle & Basics Small Die, HCD1-7154
Ranger Archival Ink Pad - Rose Madder, RACP638
Ranger Archival Ink Pad - Garden Patina, RACP992
Ranger Archival Ink Pad - Leaf Green, RACP436
Ranger Archival Ink Pad - Cactus Flower, RACP985
Intricate Swirl Frames Die, HCD2-7191
Ranger Archival Ink Pad - Plum, RACP499
Hand-Stitched Accents Cling Stamp Set, HCPC-3851
Buttons and Blooms Cling Stamp Set, HCPC-3849
Buttons and Blooms Paper Collection, HCDP1-295
Hand-Stitched Accents Die, HCD1-7207
Buttons and Blooms Die, HCD1-7205

Other Products: White cardstock. Clear Glass Micro Beads.

For more tips on creating with the Buttons and Blooms collection, watch the tutorial at https://youtu.be/WpR2XrSH0U0.

Instructions: Take cardstock size 12"x4" and fold it to final size 6"x 4" (top fold card). Cut one large Intricate Swirl Frames Die on white cardstock and adhere it on the base of the card as shown. Take pattern paper size 3.875"x 5.75" and distress the edges and adhere it on the Intricate Swirl Frame. Take another small frame from Intricate Swirl Frames Die and adhere it on the pattern paper and add some crystal clear glitter.

Now cut one circle from Eyelet Circle & Basics Small Die and adhere it on top edge of the card with foam tape to give some dimension.

Next add Beautiful sentiment "Birthday Wishes for you" from Hand-Stitched Accents Cling Stamp Set with archival ink-plum on white cardstock and cut it with coordinating die, color them with archival ink and adhere it with foam tape and add some crystal clear glitter using dries clear adhesive.

Now stamp some flowers and buttons from Buttons and Blooms Cling Stamp Set with archival ink-plum and garden patina on white cardstock and cut them with coordinating die and color them with archival ink-sunshine, rose madder, cactus flower and garden patina. Then adhere two layers of petals to make one flower and adding button at the centre of the flower with clear glass micro beads and pasting with foam tape and then add some crystal clear glitter on the petals. Arrange these flowers as shown.

Wednesday, 3 October 2018

With All My Love

Dear Friends,
Another inspiration for Heartfelt Creations with beautiful Oakberry Lane Collection.


Products Used
Double Dots 100pc. -3D Foam Circles, DDOTS
Funnel Tray, 359503
Designer Dries Clear Adhesive, 159723
Stack and Store Daubers-Pack of 30, HCDA2-450
Rajni Chawla's Crystal Clear, PGM15015
Rock Candy Stamens-Small, HCS1-459-4
Bridal Bouquet Stamens-Small, HCS1-460
Ranger Archival Ink Pad - Jet Black, RACP468
Ranger Archival Ink Pad - Majestic Violet, RACP494
Ranger Archival Ink Pad - Rose Madder, RACP638
Ranger Archival Ink Pad - Fern Green, RACP962
Ranger Archival Ink Pad - Leaf Green, RACP436
Ranger Archival Ink Pad - Cactus Flower, RACP985
Intricate Swirl Frames Die, HCD2-7191
Oakberry Lane Blossoms Cling Stamp Set, HCPC-3842
Oakberry Lane Blossoms Die, HCD1-7200
3D Blossoms Shaping Mold, HCFB1-469
Cheerful Note Sentiments Cling Stamp Set, HCPC-3848
Ornamental Tags Die, HCD1-7203

Other Products: White cardstock, distress ink- seedless preserves, dry grass.

For more tips on creating with the Oakberry Lane collection, watch the tutorial at https://youtu.be/HirfUN8NEYY.

For more tips on creating with the flower shaping molds, watch the tutorial at https://youtu.be/FSdPL7nXvQE.

Instructions: Take white card-stock size 4" x 12" and fold it to 4" x 6" (tent fold card). Cut one large frame die from Intricate Swirl Frames Die on white card-stock and adhere it on the card base as shown.

Cut one white card-stock size 3.375" x 5.375" and create background with distress ink-seedless preserves. Adhere some dry grass.

Cut one Intricate Swirl Frames Die from white cardstock and adhere it with Designer Dries Clear Adhesive, as shown. Cut one Ornamental Tags die and add sentiment from Cheerful Note Sentiments Cling Stamp "with all my love" with archival ink-jet black and adhere them with foam tape at the centre of the card as shown.

Stamp some blossoms and leaves from Oakberry Lane Blossoms Cling Stamp Set with archival ink-violet, red carnation, fern green and cut with the matching die and color them with archival ink-cactus flower and leaf green and shape them with 3D Blossoms Shaping Mold. Add stamens at the centre of the flower, and then add some crystal clear glitter.

Now arrange these leaves and flowers as shown.

Wednesday, 26 September 2018

So Grateful for You-Debuting Elegant Tags and Sentiments by Heartfelt Creations

Dear Friends,

Elegant tag dies and sentiment stamps are one of the most used tools in the craft room, and it's every crafters desire to have a well-rounded collection. This one of a kind collection provides you with a selection of greetings paired with matching designer tags, to make the perfect sentiment for your handmade cards and gifts. These dies and stamps are a wonderful way to adorn special gifts, tuck into pockets of greeting cards, and are the main staples for the craft room and will always stand the test of time. Here's my inspiration


Products Used
Double Dots 100pc. -3D Foam Circles, DDOTS
Funnel Tray, 359503
Designer Dries Clear Adhesive, 159723
Deluxe Flower Shaping Kit, HCST1-401
Stack and Store Daubers-Pack of 30, HCDA2-450
Rajni Chawla's Crystal Clear, PGM15015
Rock Candy Stamens-Small, HCS1-459-4
Ranger Archival Ink Pad - Rose Madder, RACP638
Ranger Archival Ink Pad - Fern Green, RACP962
Eyelet Rectangle & Basics Die, HCD2-7189
Ranger Archival Ink Pad - Leaf Green, RACP436
Ranger Archival Ink Pad - Cactus Flower, RACP985
Eyelet Lace Frames Die, HCD2-7192
Oakberry Lane Blossoms Cling Stamp Set, HCPC-3842
Oakberry Lane Paper Collection, HCDP1-294
Oakberry Lane Blossoms Die, HCD1-7200
3D Blossoms Shaping Mold, HCFB1-469
Ornamental Tags Die, HCD1-7203
Album Tags and Accents Die, HCD1-7202

Other Products: White cardstock.

For more tips on creating with the tags & sentiments, watch the tutorial at https://youtu.be/eAfLuNkRda4.

For more tips on creating with the Oakberry Lane collection, watch the tutorial at https://youtu.be/HirfUN8NEYY.

Instructions: Cut one 5" x 7" cardstock to create a base for album. Now cut one pattern paper and tear the edges. Before pasting pattern paper, adhere some dry grass and then paste pattern paper taken from the Oakberry Lane collection.

Cut one Eyelet Lace Frames Die and adhere it with Designer Dries Clear Adhesive.

Cut one large tag die from the Album Tags and Accents Die and cut one smaller tag die on pattern paper and distress the edges and paste it. Now cut two eyelet rectangle diecuts from white cardstock and create shaker embellishment.

Stamp some blossoms and leaves from Oakberry Lane Blossoms Cling Stamp Set with archival ink-red carnation, fern green for leaves and cut them matching die and color them with archival ink rose madder, sunflower, cactus flower and leaf green and shape them with 3D Blossoms Shaping Mold, add stamens at the centre of the flower, and then add some crystal clear glitter. For more tips on creating with the flower shaping molds, watch the tutorial at https://youtu.be/FSdPL7nXvQE. Now arrange these leaves and flower as seen on the picture.

Now cut one eyelet tag die from Album Tags and Accents Die and one smaller die from Album Tags and Accents Die and distress the edges as shown. Cut one Ornamental Tags Die with sentiment A Gift for you.

Cut seven to eight pieces of border die from Album Tags and Accents Die and paste at the edges of the album base as shown.

Have A Great  Day!!!

Wednesday, 19 September 2018

A Gift for You

Dear friends,
 Another inspiration from the Oakberry Lane Collection by Heartfelt Creations. Here's the pics


Products Used
Double Dots 100pc. -3D Foam Circles, DDOTS
Funnel Tray, 359503
Designer Dries Clear Adhesive, 159723
Deluxe Flower Shaping Kit, HCST1-401
Stack and Store Daubers-Pack of 30, HCDA2-450
Rajni Chawla's Crystal Clear, PGM15015
Rock Candy Stamens-Small, HCS1-459-4
Bridal Bouquet Stamens-Small, HCS1-460
Ranger Archival Ink Pad - Jet Black, RACP468
Ranger Archival Ink Pad - Majestic Violet, RACP494
Ranger Archival Ink Pad - Rose Madder, RACP638
Ranger Archival Ink Pad - Fern Green, RACP962
Ranger Archival Ink Pad - Leaf Green, RACP436
Ranger Archival Ink Pad - Cactus Flower, RACP985
Intricate Swirl Frames Die, HCD2-7191
Ranger Archival Ink Pad - Plum, RACP499
Oakberry Lane Blossoms Cling Stamp Set, HCPC-3842
Oakberry Lane Antics Cling Stamp Set, HCPC-3841
Oakberry Cottage & Sentiments Cling Stamp Set, HCPC-3840
Furry-Tailed Frolic Cling Stamp Set, HCPC-3839
Oakberry Lane Paper Collection, HCDP1-294
Oakberry Lane Blossoms Die, HCD1-7200
Oakberry Lane Antics Die, HCD1-7199
Oakberry Cottage Die, HCD1-7198
Furry-Tailed Frolic Die, HCD1-7197
3D Blossoms Shaping Mold, HCFB1-469

Other Products: White cardstock, Zig Clean Color Real Brush markers.

For more tips on creating with the Oakberry Lane collection, watch the tutorial at https://youtu.be/HirfUN8NEYY.

For more tips on creating with the flower shaping molds, watch the tutorial at https://youtu.be/FSdPL7nXvQE.

Instructions: Take cardstock size 10" x 7" and fold it to final size 5" x 7". Take pattern paper from the Oakberry Lane Collection and distress the edges and adhere it on the cardstock.

Stamp two large Blossoms from Oakberry Lane Antics Cling Stamp Set with archival ink-rose madder and cut it with matching die and then sprinkle some crystal clear glitter and adhere them with Designer Dries Clear Adhesive on the top left and bottom right side, as shown.

Take another white cardstock size 3.373" x 5.375" and adhere it with foam tape to give some dimension. Cut one Intricate Swirl Frames Die on white cardstock and adhere it with Designer Dries Clear Adhesive, as shown.

Next stamp one Squirrel image from Furry-Tailed Frolic Cling Stamp Set with archival ink-jet black and cut it with matching die and color it with Zig Clean Color Real Brush markers and add some crystal clear glitter. Stamp two acorns from Oakberry Cottage and Sentiments Cling Stamp Set with archival ink-plum and color them with Zig Clean Color Real Brush markers. Shape them with Deluxe Flower Shaping Kit. Stamp one blossom and leaves from Oakberry Lane Blossoms Cling Stamp Set with archival ink-violet, fern green and cut them matching die and color them with archival ink-cactus flower and leaf green and shape them with 3D Blossoms Shaping Mold, add stamens at the centre of the flower, and then add some crystal clear glitter. Now arrange these acorns, leaves and flowers as shown.

Add sentiment from Furry-Tailed Frolic Cling Stamp Set "A gift for you" with archival ink-jet black.

Have A Great Day!!!

Wednesday, 12 September 2018

Special Days

Hey friend are you as excited as we are about the Oakberry lane collection by HeartfeltCreations?

The Oakberry Lane collection features its own signature wildflower blossom ready to be stamped, colored and assembled into a realistic 3D floral embellishment to accent all of your projects.


Darling illustrations of squirrels at play on teeter totters and tire swings, gathering nuts, and bounding about in beautiful floral gardens with their tails held high, remind us that taking time to play, enjoying the company of others and banding together to make light work of the tasks at hand are important to a well balanced life! A stunning autumn themed color palette of acorn browns, woodland greens, sunset oranges, autumn leaf reds, along with deep plums and dark pinks, lay the foundation for decorative papers displaying delicate lace like patterns, vintage style barn wood patchwork backgrounds, as well as fascinating outdoor garden settings!

Products Used
Double Dots 100pc. -3D Foam Circles, DDOTS
Funnel Tray, 359503
Designer Dries Clear Adhesive, 159723
Deluxe Flower Shaping Kit, HCST1-401
Stack and Store Daubers-Pack of 30, HCDA2-450
Rajni Chawla's Crystal Clear, PGM15015
Bright Bead Stamens-Medium, HCS1-458-3
Rock Candy Stamens-Small, HCS1-459-4
Ranger Archival Ink Pad - Sunflower, RACP005
Ranger Archival Ink Pad - Rose Madder, RACP638
Ranger Archival Ink Pad - Leaf Green, RACP436
Eyelet Lace Frames Die, HCD2-7192
Ranger Archival Ink Pad - Plum, RACP499
Oakberry Lane Blossoms Cling Stamp Set, HCPC-3842
Oakberry Cottage & Sentiments Cling Stamp Set, HCPC-3840
Oakberry Lane Paper Collection, HCDP1-294
Oakberry Lane Blossoms Die, HCD1-7200
Oakberry Cottage Die, HCD1-7198
3D Blossoms Shaping Mold, HCFB1-469

Other Products: White cardstock. Zig Clear Color Real brush.

For more tips on creating with the Oakberry Lane collection, watch the tutorial at https://youtu.be/HirfUN8NEYY.

For more tips on creating with the flower shaping molds, watch the tutorial at https://youtu.be/FSdPL7nXvQE.

Instructions: Cardstock size 7"x10"and the final size of card is 7" x 5" (tent fold card). Adhere patterned paper with torn edges.

Cut two Eyelet Lace Frames Die on white cardstock and adhere on the card using Designer Dries Clear Adhesive.

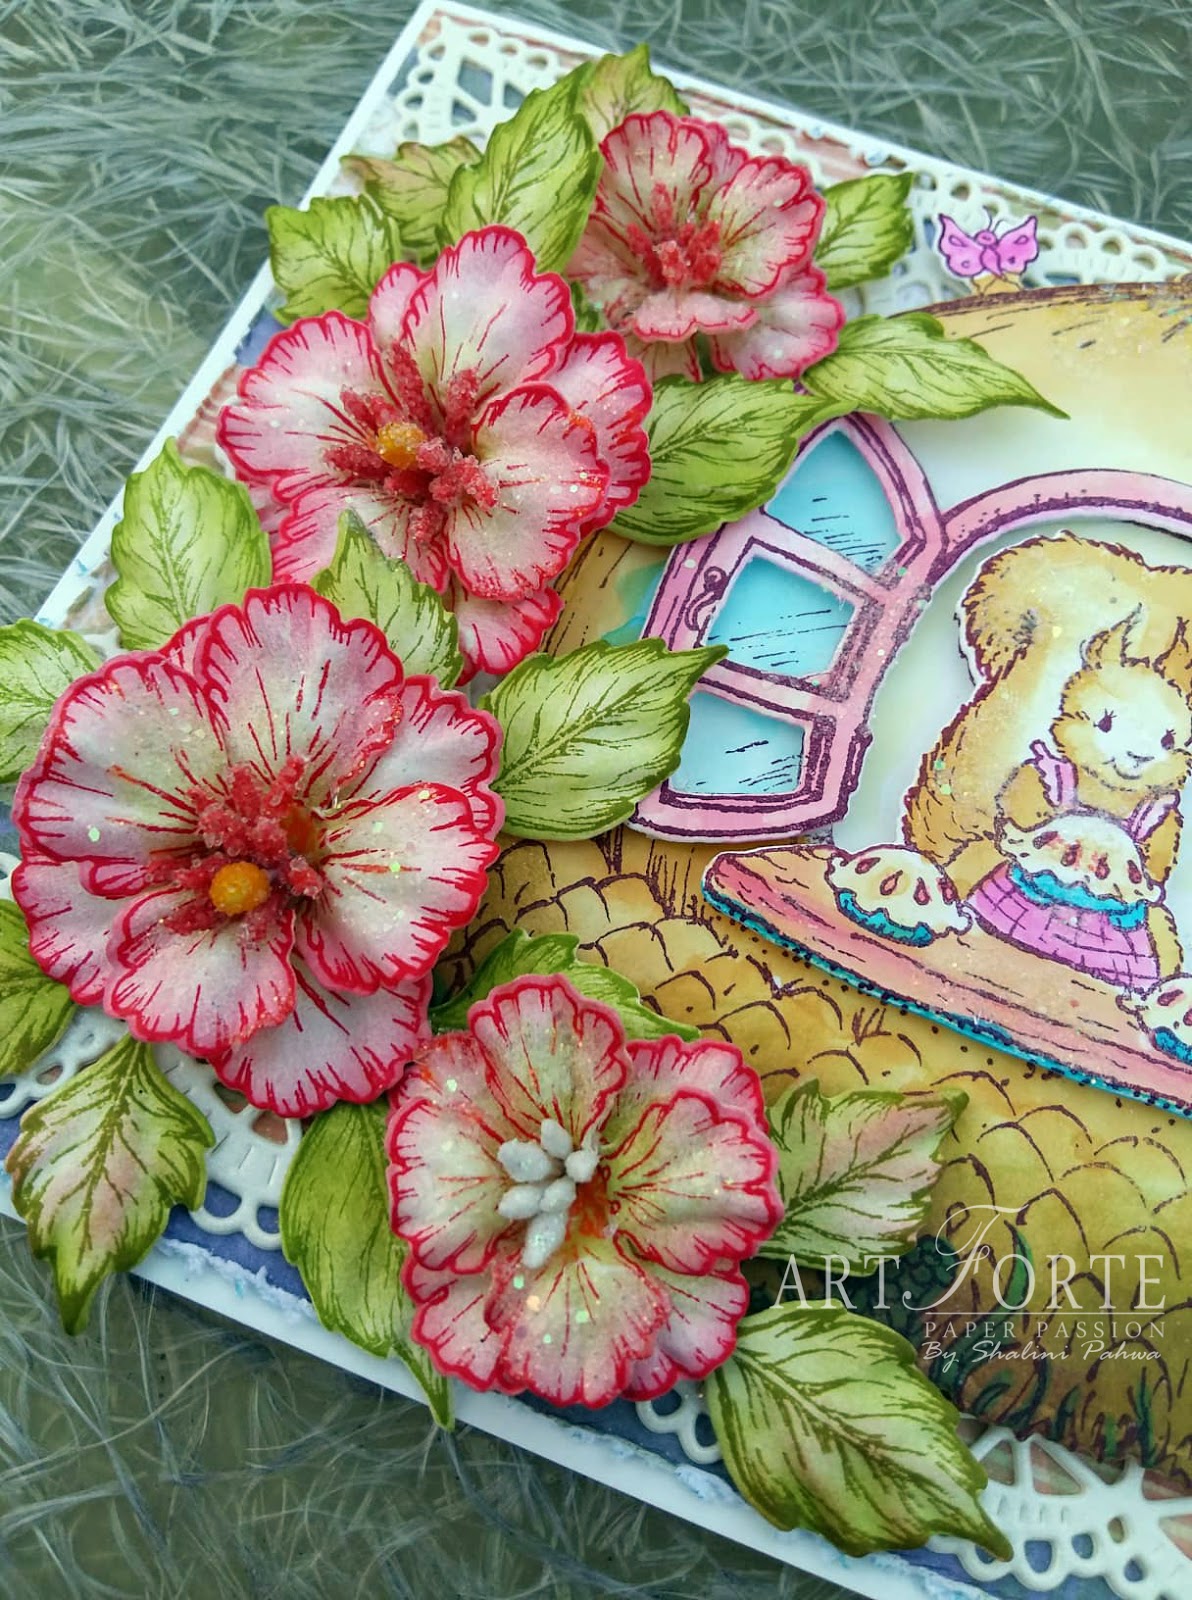
Now stamp One Oakberry Cottage with archival ink-Plum and cut it with matching die, and color it with Zig Color Clear Real Brush Markers. Adhere with foam tape and sprinkle crystal clear glitter. Stamp again only window and sweet little squirrel image twice with archival ink-plum and cut them with matching die. Color them using Zig Color Clear Real Brush and adhere with foam tape and sprinkle some crystal clear glitter.

Now stamp some Oakberry Lane Blossoms with archival ink-Carnation Red and cut them with matching die and color them with archival ink rose madder and give shape using 3D Blossoms mold Add stamens at the center and sprinkle with some crystal clear glitter. Stamp some leaves with archival ink-fern green and cut them with matching die and color them using archival ink-leaf green. Now arrange these flowers and leaves as shown.

Add Sentiment from the pattern paper. Distress the edges and adhere with foam tape.

Have A Great Day!!!