Friday 30 August 2013

Happiness Tissue Box

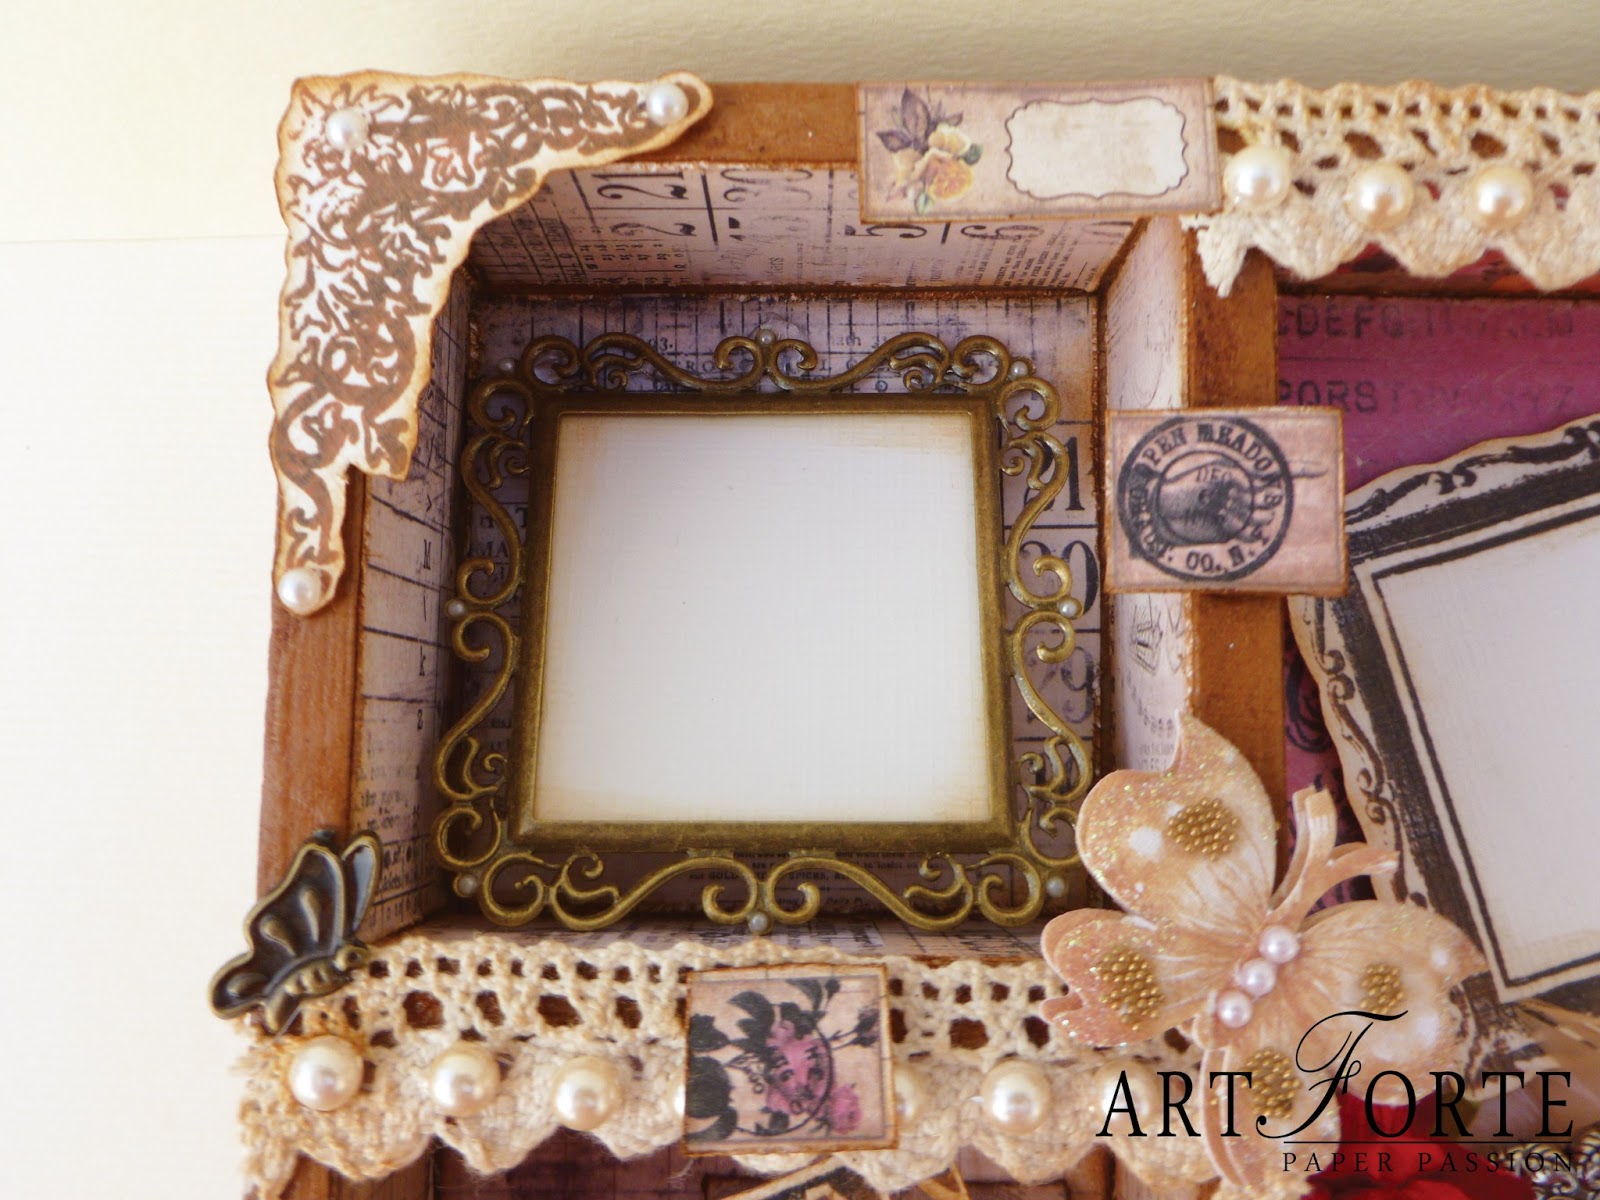
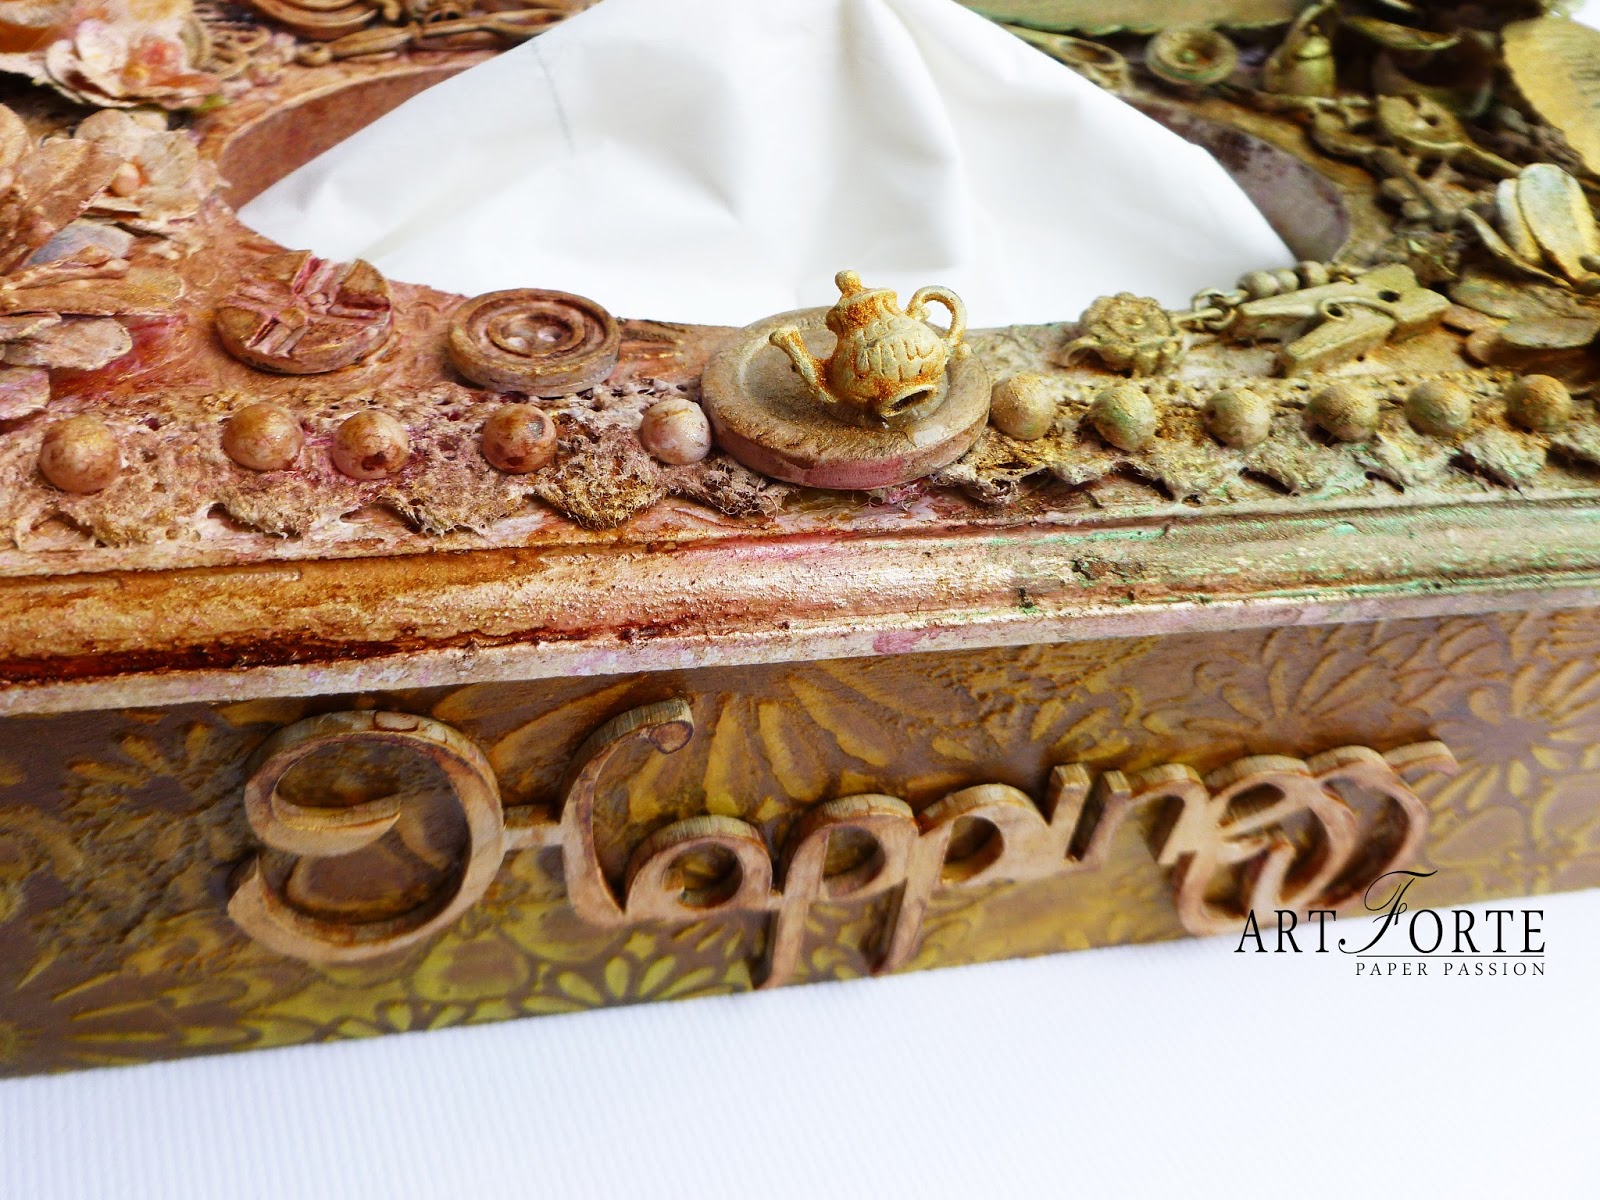
Every one of us is using paper napkins. Whether it is Kitchen, Dining table, Car, Work desk or Kids’ study, paper napkins have become integral part of our daily living. Wish we could reinvent this staid and unattractive looking napkin box to go with our surrounding themes. That is exactly what I am trying to change today. Presenting “HAPPINESS TISSUE BOX” made with mix media. 


The fun with mix media is that you can give the product a look and color that you desire it to be given – in order to make the product gel with its surroundings. I have given a earthy look to the box. I have used laces, trinkets, flowers on the top with a liberal coat of Gesso topped up with Little Lindys Spray. The sides of the box has been painted with Little Lindys Spray using gel medium and stencils to give it a raised (embossed) look.
I am sure you would like this collection.

Products uesd here:
MDF tissue box, happiness
Gesso
Mod-podge
Laces
Crafters Worshop Stencil-Flower Frenzy
LiQuitex Light Modelling Paste-Gel Madium
Charms
Mulberry Flowers
Little Lindys Spray:
Starbust: hottie Patottie Hot Pink, Winter Jasmine Gold, Tiffany's Blue, Sea Mint Green,
Glitz spritz: Blazing Sun
Moon Shadow Mist: Phantom Fuchsia, Mystic Malachite, Van Dyke Sepia


Challenge Entered:
Lindy’s Stamp Gang color challenge: August
http://lindystampgang.wordpress.com/2013/08/01/lindys-stamp-gang-color-challenge-august/
Lindy’s Stamp Gang color challenge: August

Have A Nice Day!!!
Happy Crafting!!!

Friday 16 August 2013

Mixed Media Layout 12"X12" with tutorial

Dear Friends and Crafters

There are times when one creates such a product that he/she may also be surprised at his own creation. Leonardo da Vinci if did not pick up his brush one day and decided that he would create “Mona Lisa”… he just let his creativity flow and what came out was a masterpiece that even today we get mesmerized by seeing it. The feeling of satisfaction of creating something which you feel is a reflection of nearly your best, is indeed immense. I am nowhere in comparison with such legends but I am having the same feeling today as I present to you my latest creation “The Moonlight” – a photoframe using mix media, which I consider is my best work till date.Here's the pix...


Here's the tutorial
For this frame, I first applied “Gesso” acrylic color on a chip board to prepare base for my working

.

 Then I pasted some laces using Mod Podge and heating tool.

Then I used some TCW (the crafters workshop) templates with “Liquites Light Modelling Paste” color to create shapes (honey comb, butterfly) on the base itself. This is important since later when I would use color sprays these bases would come out vibrantly giving a total different look to the creation, Without these undulations in base, the base will look flat.


Then I used flowers, trinkets etc, to define the boundaries of the place where the photo would be placed. Since these flowers would be painted and repainted subsequently, you may not use your best flowers here.


After making your desired combination of the flowers and trinkets in the created base, apply a uniform layer of “Gesso” on it. This would make all things blend together and create a base on which colors may be applied to give any sort of look.

Then I used color sprays (Lindys Stamp Gang) of various hues to get a “moonlight” look to the frame – white but still resplending the orange and golden hue of the sun.


I hope you would also like the creation as much as I loved creating it.
And Please give your value-able comments below


Happy Crafting!!!!!

Products used
Laces
Prima Trinkets


Tuesday 30 July 2013

Bingo Round 7

Hi Friends,

I am sure you all would be enjoying Our Anniversary Special BINGO game...I simply loved it as it is an interesting way not only to learn different products and their usages but also to keep yourself abreast with the wherewithal's of the craft world...

Some of you would be close to the bingo...while others would wish that my selection of 3 products exactly matches their selection, so that they bridge the gap...So best of luck to everyone.

Two products announced at http://www.crafterscornerindia.blogspot.in/2013/07/bingo-round-7.html

Third Product...Martha Stewart Paper Punch

One of the best best quality paper punches and do check the new collection here

That's all for today and do check the next list at http://priya-n-papers.blogspot.in/

Have A Great Day!!!

Love

Shalini Pahwa

Friday 5 April 2013

Reflection of Life

A masterpiece for every room, this lovely creation is a potpourri of your small collections, pictures and love notes. Make your memories and priced possessions eternal but placing it in this frame. Whether it is the first love note that you received, or the picture of your convocation or the first step that your child took, the Frame has a place for every milestone in your life. In fact it is your life’s reflection – captured in a unique way.

Made from wooden box and having 5 – 6 shelfs, applied the mod podge matte-mat-mate across the frame and then the Frame is covered with “Prima – Romance Novel” ( in love with this stack, amazing collections ) Pattern Paper stack and pasted the paper using mod-podge. The Frame is further decorated with laces, pearls, paper flowers, die cut and small slogans to add to the vintage and classical look of the frame. Stamping and distressing technique is used across the frame for that ultimate look.
Here's the pix


Products used here:
Mulberry flowers, laces ribbon
Stamps:-Bo-Bunny's Enchanted Clear Stamps 6, Hero Arts My Favourite, Kaisercraft Lullaby collection,
Dies: Magnolia Paris NightSizzix Corner Flourish, Spellbinders Wrought Iron
Embellishments : assortie brons en zilver,
Distress Ink:  Ranger's Vintage Photo

Price on Request

Hope you all like it and comment on it
Have A Great Day !!!

Wednesday 13 February 2013

Basket of Love


Hi Everyone
February is a typical month – smaller than any other month but perhaps most important for everyone in love with craft… The month is named after Latin term “februum” which means purification. February has something which no other month could have… It harbingers the beginning of spring, the fragrance of flowers in the air, the swings on trees, the month of blossom and a month of love… 

A famous American TV star and author Barbara De Angelis described the emotions of love as “Love is a force more formidable than any other. It is invisible, it cannot be seen or measured, yet it is powerful enough to transform you in a moment, and offer you more joy than any material possession could”.

Wednesday 6 February 2013

Flower Tutorial Using Embossing Powder


Hi Everbody,
Today I’m going to share the tutorial on creating a flower using Tim Holtz's Tattered Florals Die.
Here's a Pix

Supplies needed-

Step 1. Place all of the flower layers into an embossingfolder -i've used Spellbinders M-bossabilities and run it through your Big Shot machine.


Step 2. Ink each layer using Distress ink ( since my paper was white I had shaded both side)


Step3. Gently pat embossing stamp pad onto the layer. You do not have to cover the entire layer. Just randomly blot the stamp pad. While the embossing stamp is still damp, pour Ranger Super Fine Details Embossing Powder onto the flower layer and repeat this step for each layers.


Step 5. Shake off the excess embossing powder and heat each layer with a heat tool.
Step 6. Ink the edges of each layer to add a little depth.
Step-7. You can choose which layer you would like to use and how to assemble them to create your flower. For the one flower I used three layer of large layer, and two medium.
Step 8.  Using a wooden skewer, curl the petals of the three layer inward and outward as shown.

Step 9. For the medium layer, push up all of the petals.

Step 10. Assemble your flower and place a brad, or small flower or pollens. And you’re done!!!

I used the remaining flower layers to create the flower ... Use your creativity to vary the look of the flower.


Thanks for checking out my tutorial. Hope you find it useful!!!!
All the products used here are available at http://www.crafterscorner.in

Sunday 20 January 2013

Paper Napkin Holder


Hi
Everybody!!!!
Today i really enjoyed working on this product which i'm going to share today. Here's the pix-


In this project I've used spellbinder dies-Labels 20, martha stewart punchpattern paper my favourite-DCWV-Once Upon a Time Paper Stackmulberry flowers, laces, pearls, feather, sentiments-fiskar stampsTim Holtz ink.
All the products are available at http://www.crafterscorner.in. For any query contact at info@crafterscorner.in
I hope everbody would like my work and please give your comments!!!!
and don't forget to participate this month  crafters corner challenge-"Anything but not a Card or layout"
Happy Crafting
Have A Nice Day

Tuesday 8 January 2013

Pencil/Stationary Stand


Hi
Happy New Year To all of You
Today i'm going to share this pencil/stationary stand--- first i pasted a pattern paper for the base and used torn effect on the pattern paper also and then i cut magnolia lovely fence and then i stamped Tilda of Sweden and colored with Staedtler color pencil using Koi Water Brush (really liked this product) and used mulberry flowers, lace, pearl, feather.
All the products used here are all available at http://www.crafterscorner.in
Here's the pix


This Month Challenge Theme at Crafters Corner is : Anything But Not A Card or Layout
and the winner will recieve an amazing prize of Magnolia Magazine....WOW
Have A nice Day!!!!!